guest post by Sindre Kaupang
Whether you like it or not, in order to keep busy and still have a music tuition business after this Corona crisis has settled, you might be forced to do online lessons for some time.
If you’ve never done it before and you’re used to regular face-to-face lessons, the thought of this can be scary. This crisis came so suddenly, out of the blue, and caught us all off guard. We’ve had to adapt super quickly.
I’ve been doing online lessons for a while and have discovered what works and doesn’t work for a range of instruments. In this short guide, I will introduce you to the webcam angles and setups that you will most likely need. If you are playing an instrument that I’m not mentioning, you can easily translate one of these setups to suit your own instrument. The piano has the most advanced setup, so that gets most of my attention.
In my opinion, the setup is one of the most important factors for a successful online lesson. That’s why I have chosen to dedicate a whole post just for this topic. If you’ve got the setup right, the rest will be a walk in the park. Or perhaps more appropriately nowadays – a walk in the garden…
A quick tip before we start
Generally, a laptop is better to use than a phone or a tablet. This is because you can easily adjust the screen to make the webcam point in the direction you want.
Guitar setup 1: Face and both hands in shot
With this view, it feels like you’re sitting quite far away from your laptop. You have to get up every time you need to use the keyboard. But this view is really useful for your students since they can see everything they need to see in on single shot. This is a great view if you’re going through rhythm or looking at how both hands function together.
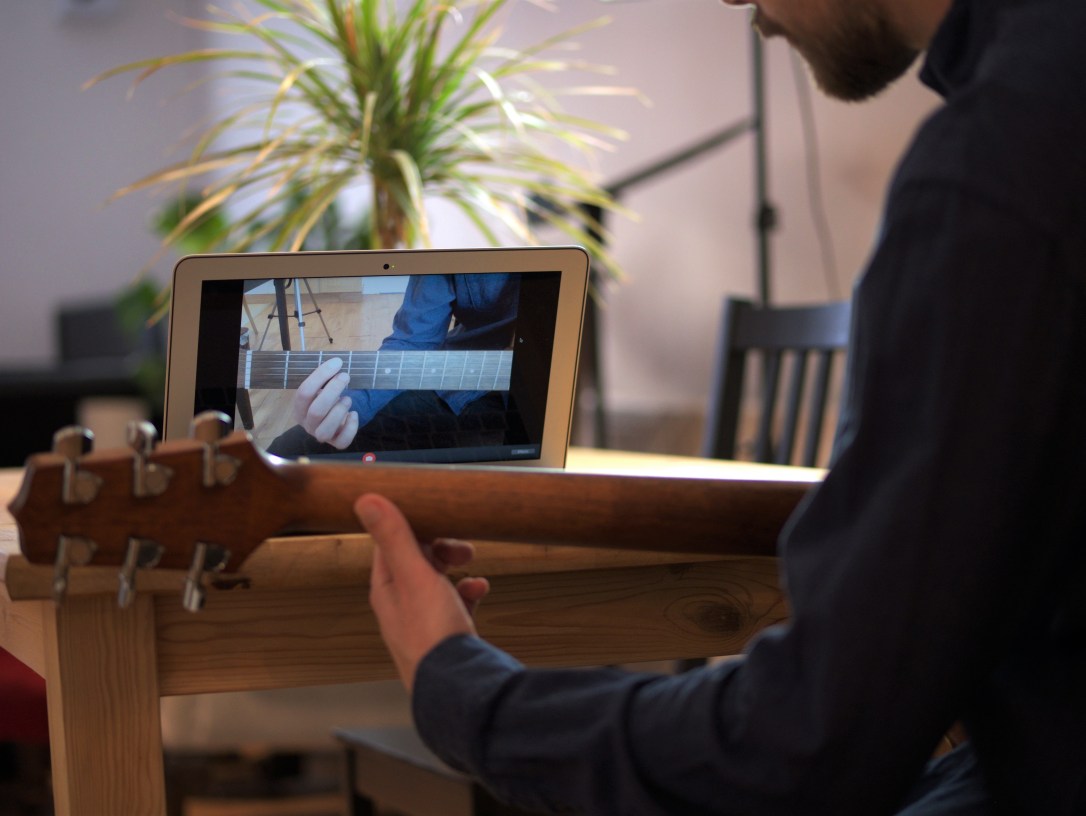
Guitar setup 2: Both hands in shot

In this view, your student can see both your hands up closer, but not your face. If the video quality is good, both the fretboard and your right hand is close enough for your student to see most details, such as chords, melodic passages and fingering. Because of this, this is a camera angle that can be used quite a lot. The one downside with this view is that your student can’t see your face.
Guitar setup 3: One of the hands in shot
Sometimes the video quality isn’t top-notch or your student might still not be able to see what you’re doing on your guitar with enough detail. You might have to push your instrument in even closer to the webcam. Use this view to demonstrate techniques or finger positions where the focus is on intricate details.
To change between these views, it’s easier to move yourself around rather than moving your device around. Unless you have your device on some sort of trolley.
Violin setup
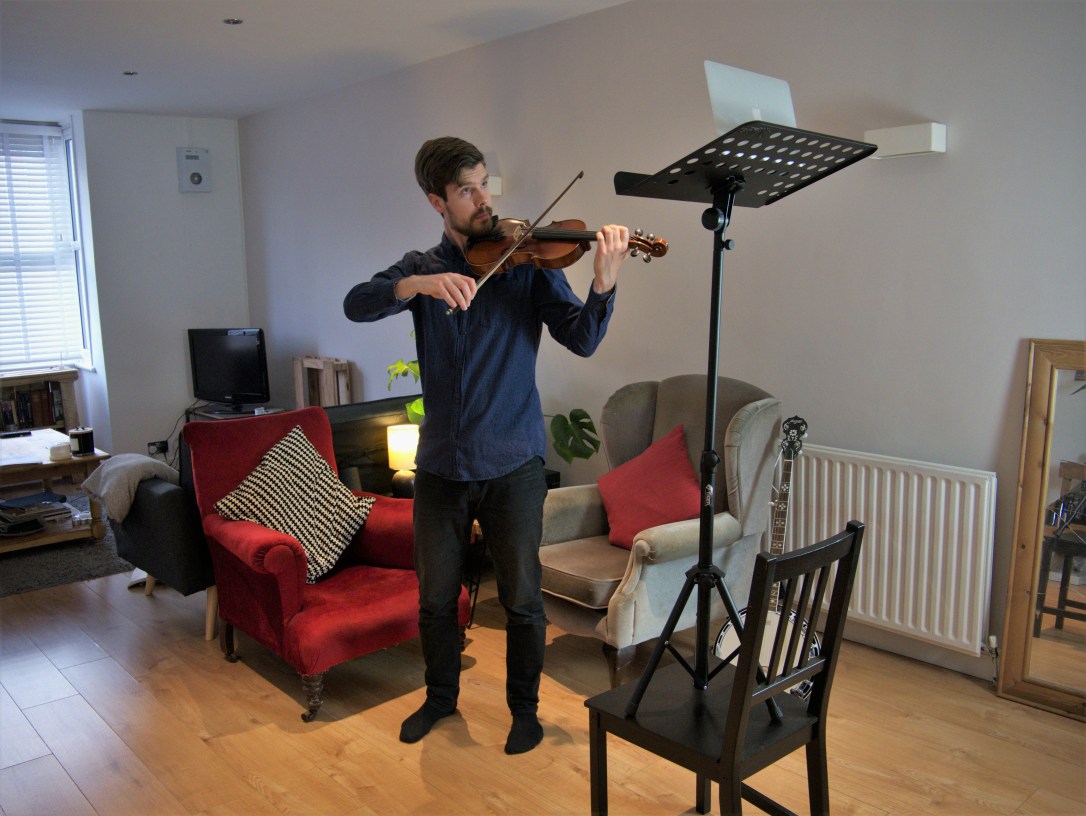
The image above explains pretty well what you need to know.
What you mainly have to take into account is that your students need to see the fingerboard from a slightly higher angle. If not, your hand will be in the way, and they won’t be able to see what your fingers are doing.
A music stand is a great way to adjust the height of your webcam. Since most music stands cannot be adjusted high enough, you might have to put it on a chair or a table.
If you cannot find a way of getting the webcam up high enough, you can also sit down on a chair. Then you could put a chair on top of a table and then put your laptop on that chair. Personally, I prefer to stand up. It’s a lot easier to move around and change the angle of the violin whilst standing up.
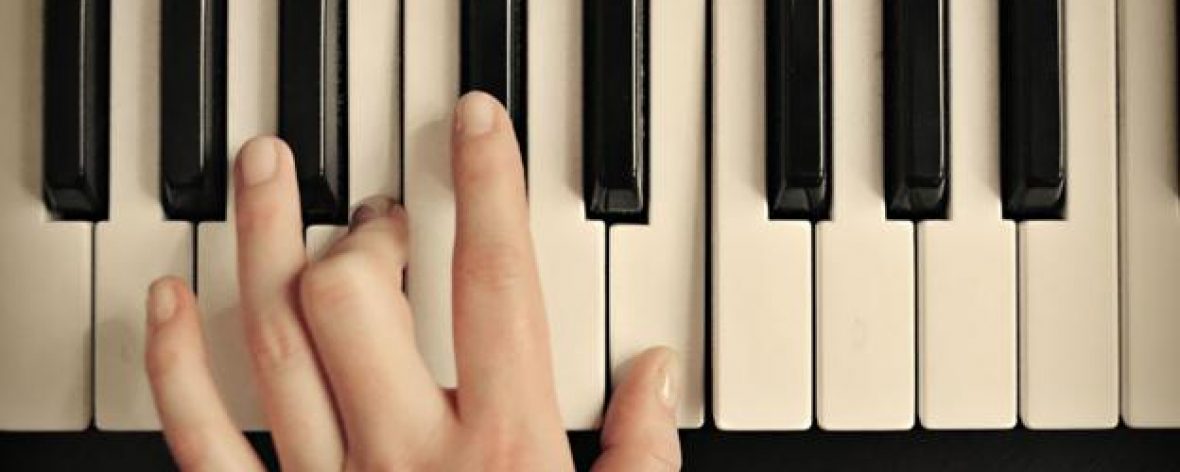
Piano setup
The Piano is the most demanding instrument to set up correctly. Ideally, you would have two camera angles when teaching the piano online – a main camera angle that shows your profile and the piano keys, and an overhead angle where your student can easily see what is going on on the keys.
In my experience, the most important angle is the overhead view. The student could get by without the angle that shows your face, but then you lose a bit of your “connection” with your student. A lot of the communication and also the fun of having online lessons lies in the fact that we are able to see each other’s faces.
You also need to have a screen in front of you or next to you so that you can see your student. Since this screen is needed, it makes sense to take advantage of this and use that angle for an extra webcam as well.
I’m now going to explain what I do to achieve a dual camera setup.
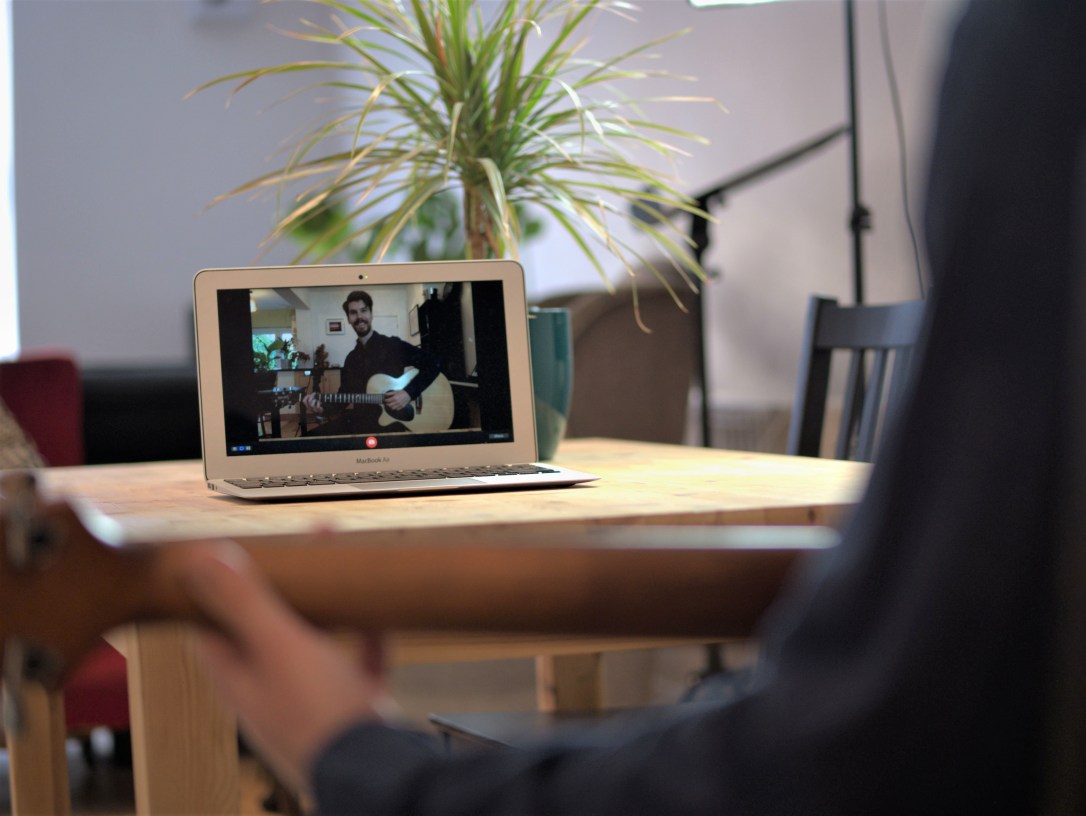
The main view
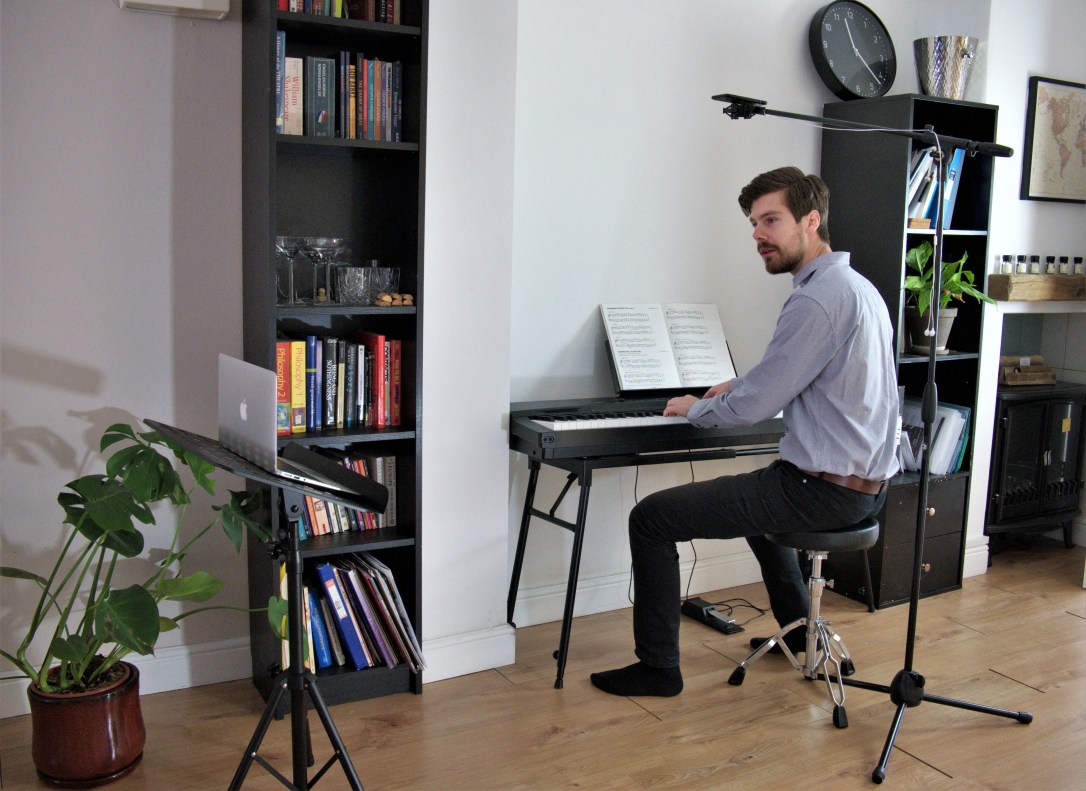
I place my laptop on a music stand, like in this picture. If you tell your student to set up their device in a similar way, then you can see everything you need of your student. Place your device quite far away so that your student can see your face as well as the keys and both your hands.
The overhead view
This is often the most important view for your student, especially for children and beginners that need a lot of specific guidance.
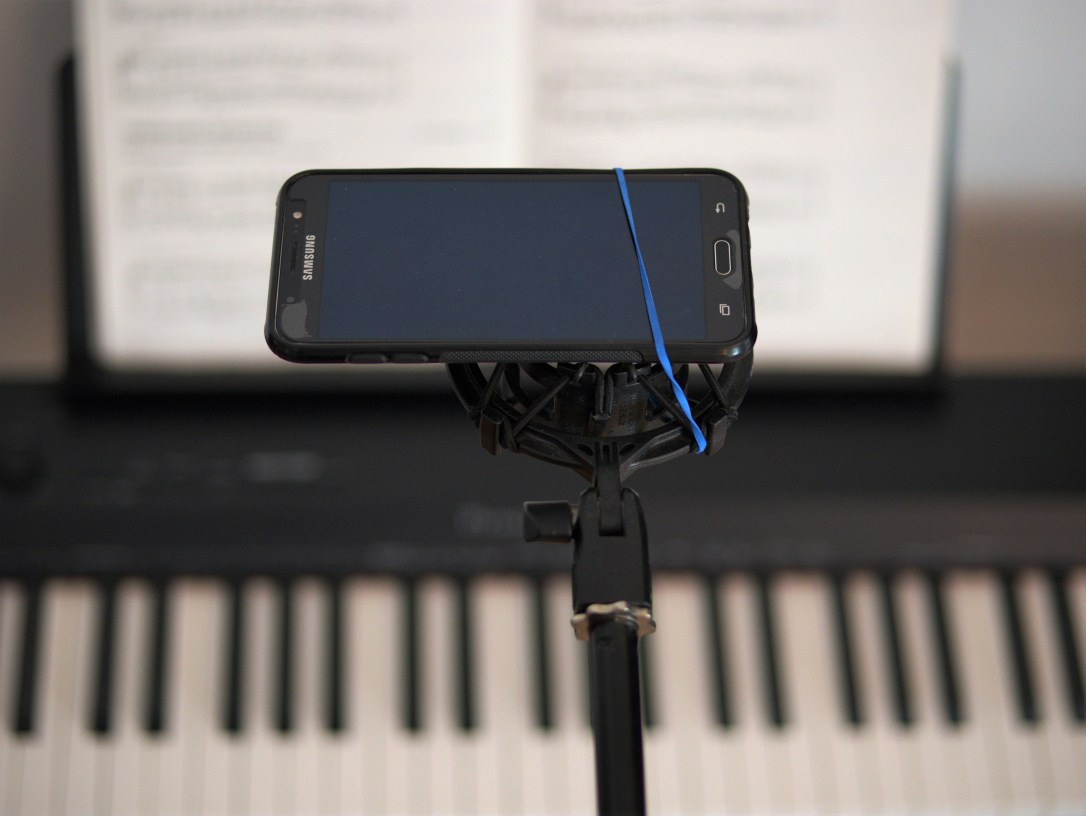
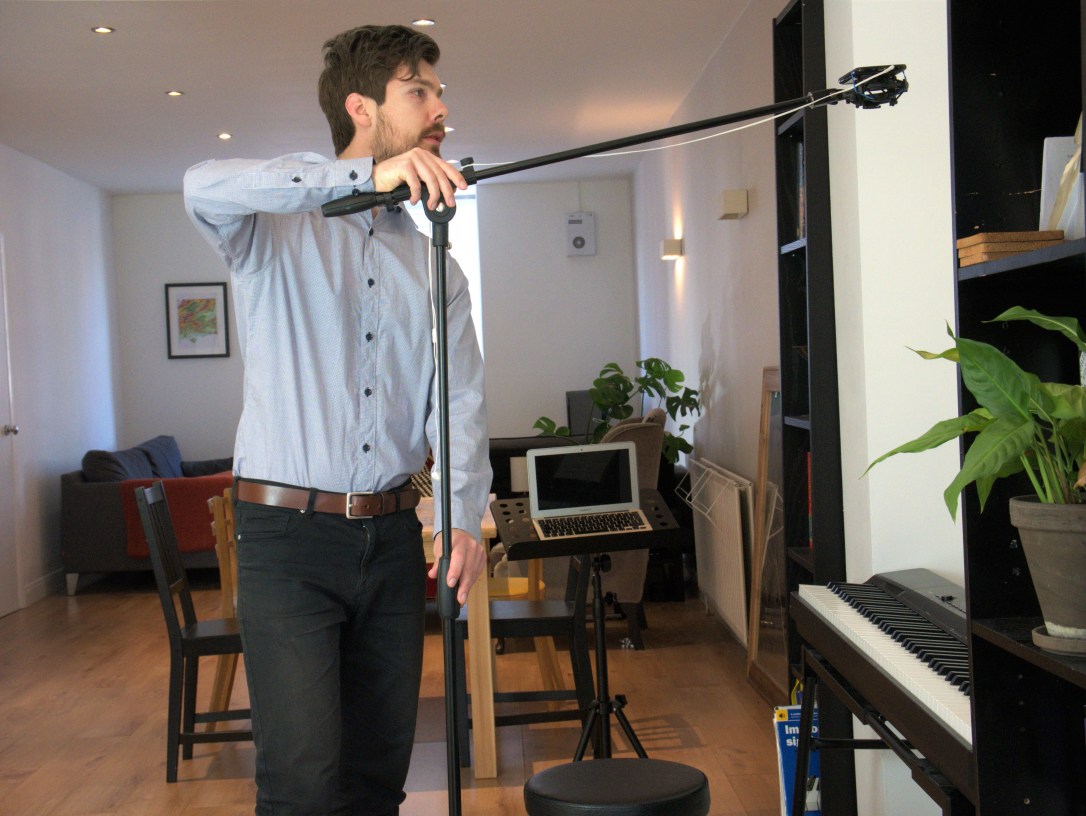
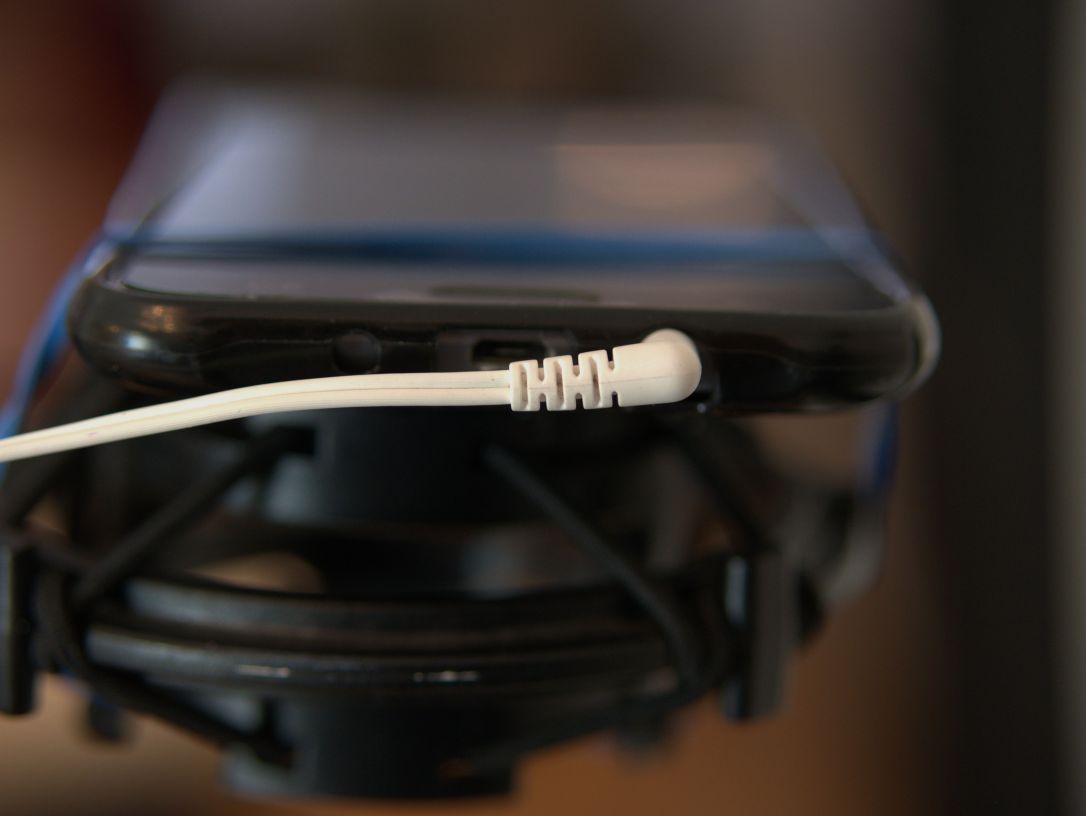
How you personally achieve this setup depends on what equipment you have available. I use my phone as the overhead camera and a microphone stand to place it in the desired position and angle.
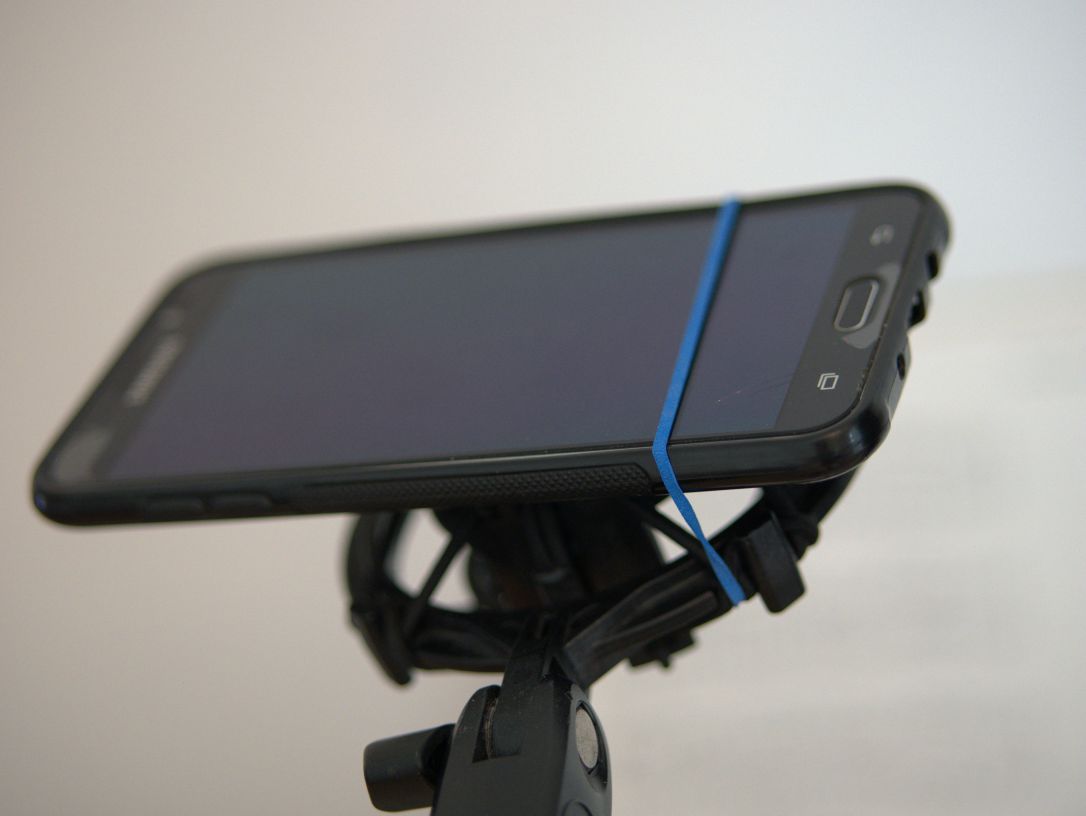
My phone is attached to the microphone mount with a rubber band.
It needs to be positioned quite high up so that your student can see both your hands on the screen. A mic stand is really handy because you can adjust the height easily. If you teach a lot of piano online and want to achieve a similar setup to this one, I would really recommend that you get a similar stand. It will save you a ton of time and make your life a lot easier.
This stand comes without a microphone mount. You need something to attach your phone to as well. In my experience, the easiest thing to use for this purpose is a shock mount like this one.
This can be attached at the end of the microphone stand, and then you can easily attach your phone to the mount with a rubber band.
Now that you have set up the two different camera angles, you’re almost ready. There are just a couple more things you need to do.
Using two different video chat accounts
To use this dual camera setup with your students, you need two different accounts in the video call software you are using – one account for your laptop and one for your phone. In other words, you need to be in a group chat. Most platforms support group chats, although Zoom has a 40 minute limit on group chats for the free version.
When the lesson is due to start, I usually call my student from my laptop. Then I add my other account (my phone) to the call while my student is on the line. That only takes a few seconds. This can easily be done with Zoom, Skype or Google Hangouts.
When you call from both accounts, both these angles will then show up on your student’s screen.
If you use Skype, make sure that you are already logged in to two different accounts before starting the call. One account on your phone, and a different account on your laptop.
Two important settings
There are two settings you need to make sure you have set right when using this dual camera setup.
Firstly, if you use your phone as the overhead camera, you need to press the button that mutes the mic on your phone. If you don’t do this, both you and your student will suffer from an atrocious feedback sound that makes everyone go mad. Let’s avoid that.
Secondly, you need to turn off the speakers on one of your devices so that you only have one single sound source coming from your student. I usually turn the sound off on my phone.
My phone doesn’t allow me to turn the sound down completely when I’m in a video call. Your phone might very well behave in a similar manner. In order to mute your phone completely, plug some earphones in.
With all of that done, you’re now ready to teach!
This might seem like a lot of things to worry about. But after just two or three lessons you will start to get used to this process. Soon, doing all of this will be a piece of cake, and it will stop being a hassle.
Your student’s piano setup
Your student’s setup is not as important as your own setup. The teacher is the only one who really needs a dual camera setup. All you need from your student is a single profile view where you can see both hands and their face in the same shot. To see their fingers better, their webcam should be positioned a bit higher than the piano keys and point slightly downwards, very similar to your own laptop setup. With this view, you will see everything you need to see.
 Sindre graduated from Rose Bruford College with a degree in Actor-Musicianship in 2015. He is a multi-instrumentalist and has been a private music teacher for 4 years. In 2018, he co-founded Duett London in order to provide a supportive and rewarding platform for music tutors to advertise their tuition services.
